Updated April 10, 2026
Build Goal
This build combines two rooftop LoRa nodes in one solar-powered enclosure: one for Meshtastic and one for MeshCore. The goal was simple: experiment with MeshCore without giving up access to the local Meshtastic network I already rely on.
I have been running a Meshtastic node on my rooftop for a while, and it has been great for local communication. At the same time, I wanted to experiment with MeshCore without losing my access to the local Meshtastic network.
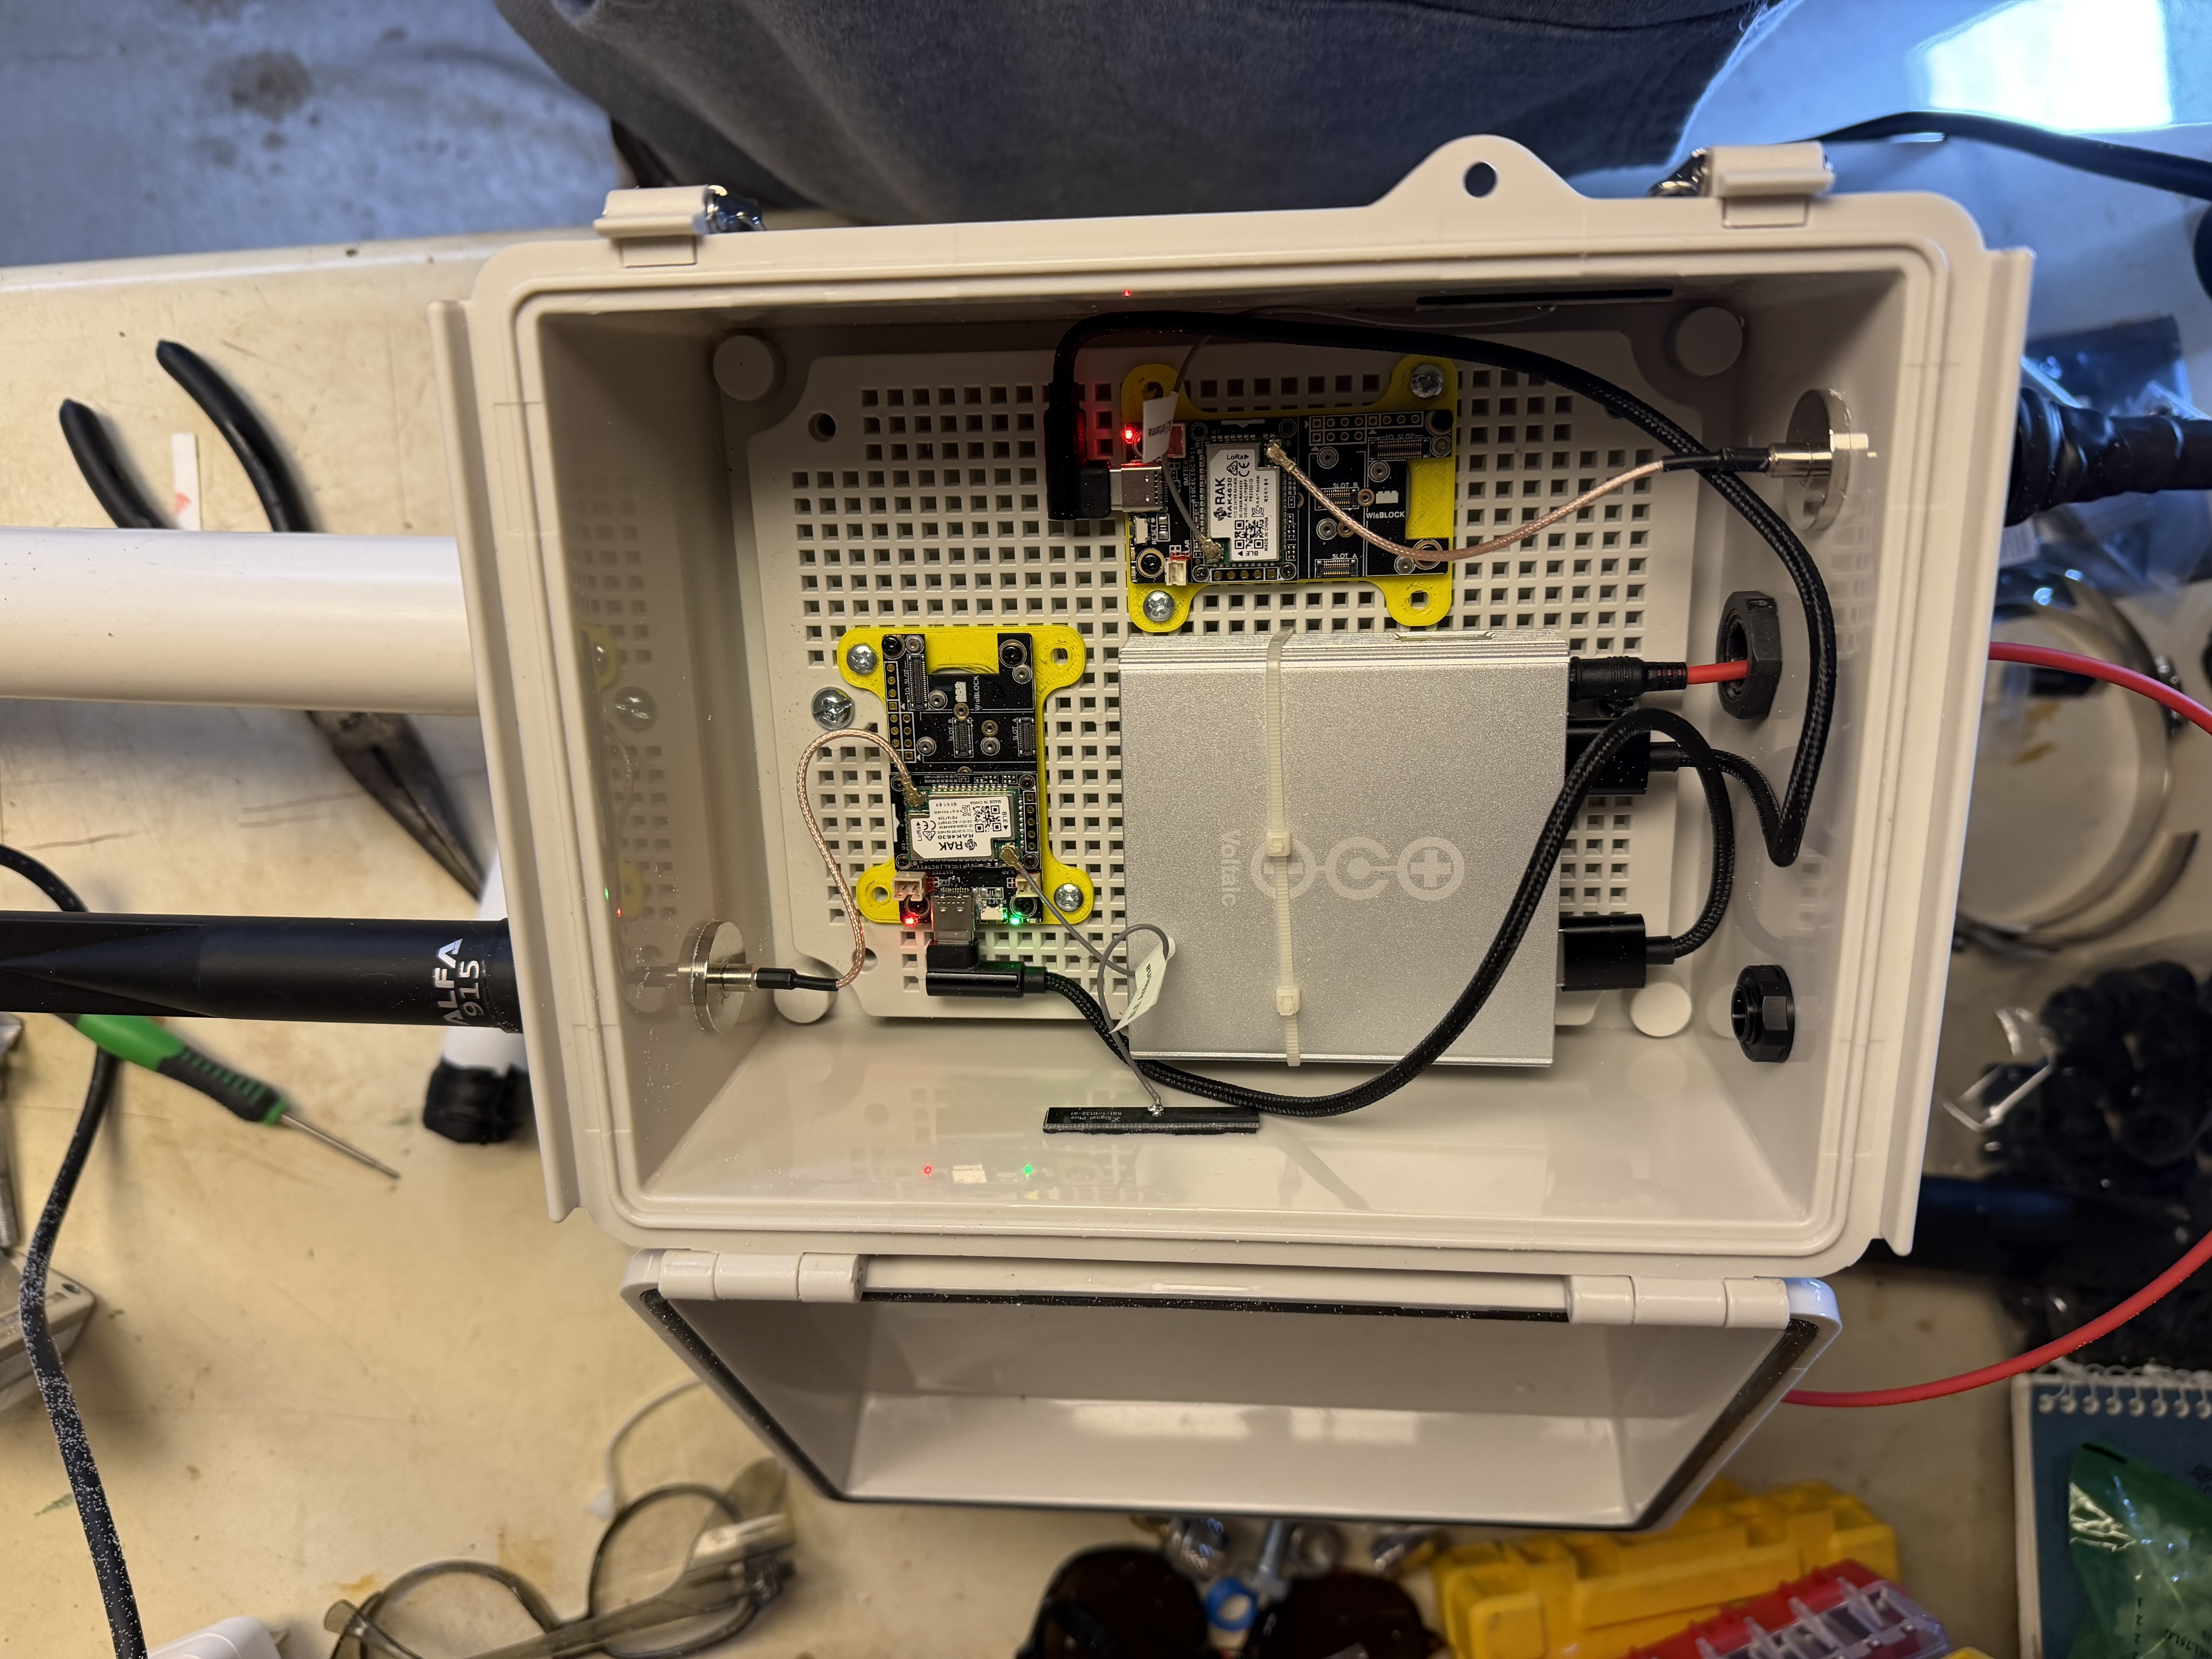
That led to a dual-mesh setup where one node runs Meshtastic and the other runs MeshCore, both inside the same enclosure and sharing the same battery and solar panel. I wanted to stay with RAK nRF-based boards because I have used them in several Meshtastic builds and really like their low power draw.
My previous rooftop solar node used a RAK 4631 board inside a RAK solar enclosure. For this version, I reused antennas I already had on hand but sourced a new enclosure, solar panel, and battery. After seeing other builders' setups, I landed on the Voltaic 10W panel and V25 battery, which should be more than enough for two low-power nodes.
Power Strategy
Even though the RAK boards support their own solar connector and charge controller, I chose to use a USB-C battery instead. That decision came down to flexibility and reliability.
- I may eventually upgrade to 1W RAK WisMesh Booster Kits when they become available, and those need more power along with an additional attached battery.
- The RAK boards do not have a great built-in power control path. When powered from the onboard battery connection, a low-voltage dip can cause them to brown out and shut off, sometimes requiring manual intervention to recover.
The Voltaic battery includes over-discharge and under-discharge protection and should cut power before a brownout happens, then restore power cleanly once the battery recovers. Hopefully that never gets stress-tested in real life, but it is a big part of why I went this route.
Mounting and Deployment
Once the parts arrived, I did what all responsible builders do in true test is prod fashion: fit everything in the enclosure, drilled the holes for the N-type bulkhead connections, and prepared it for rooftop deployment.
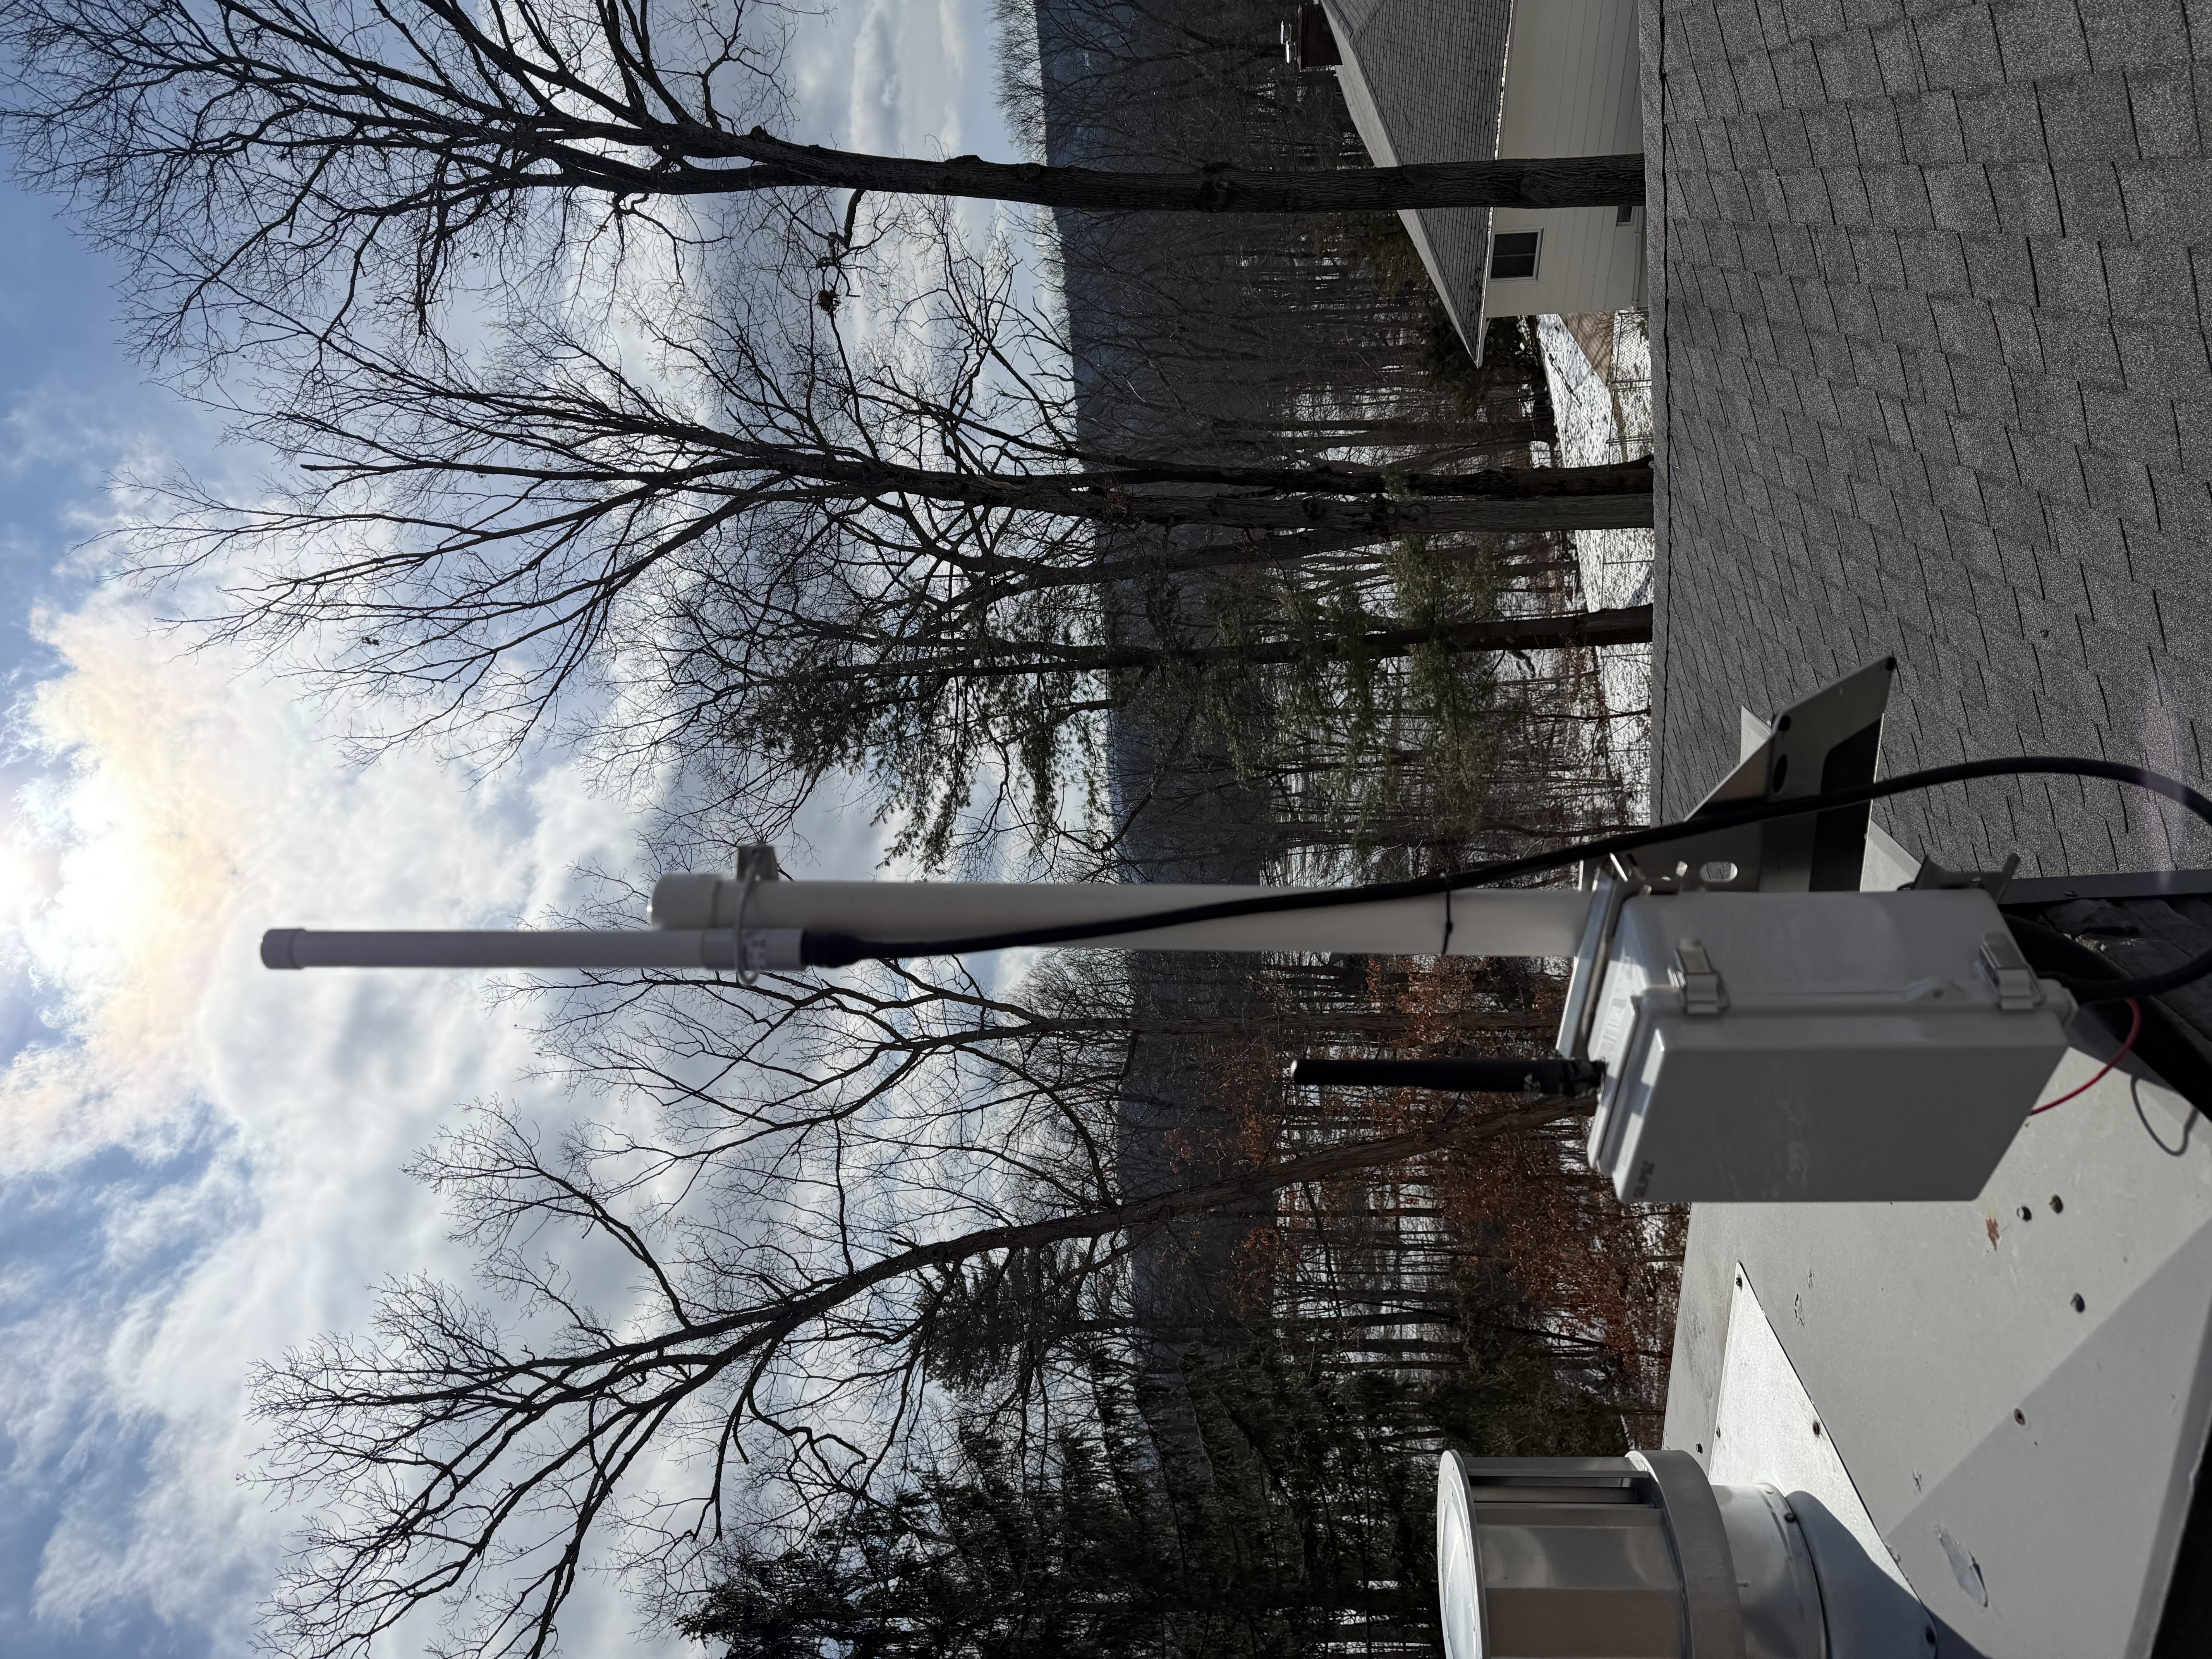
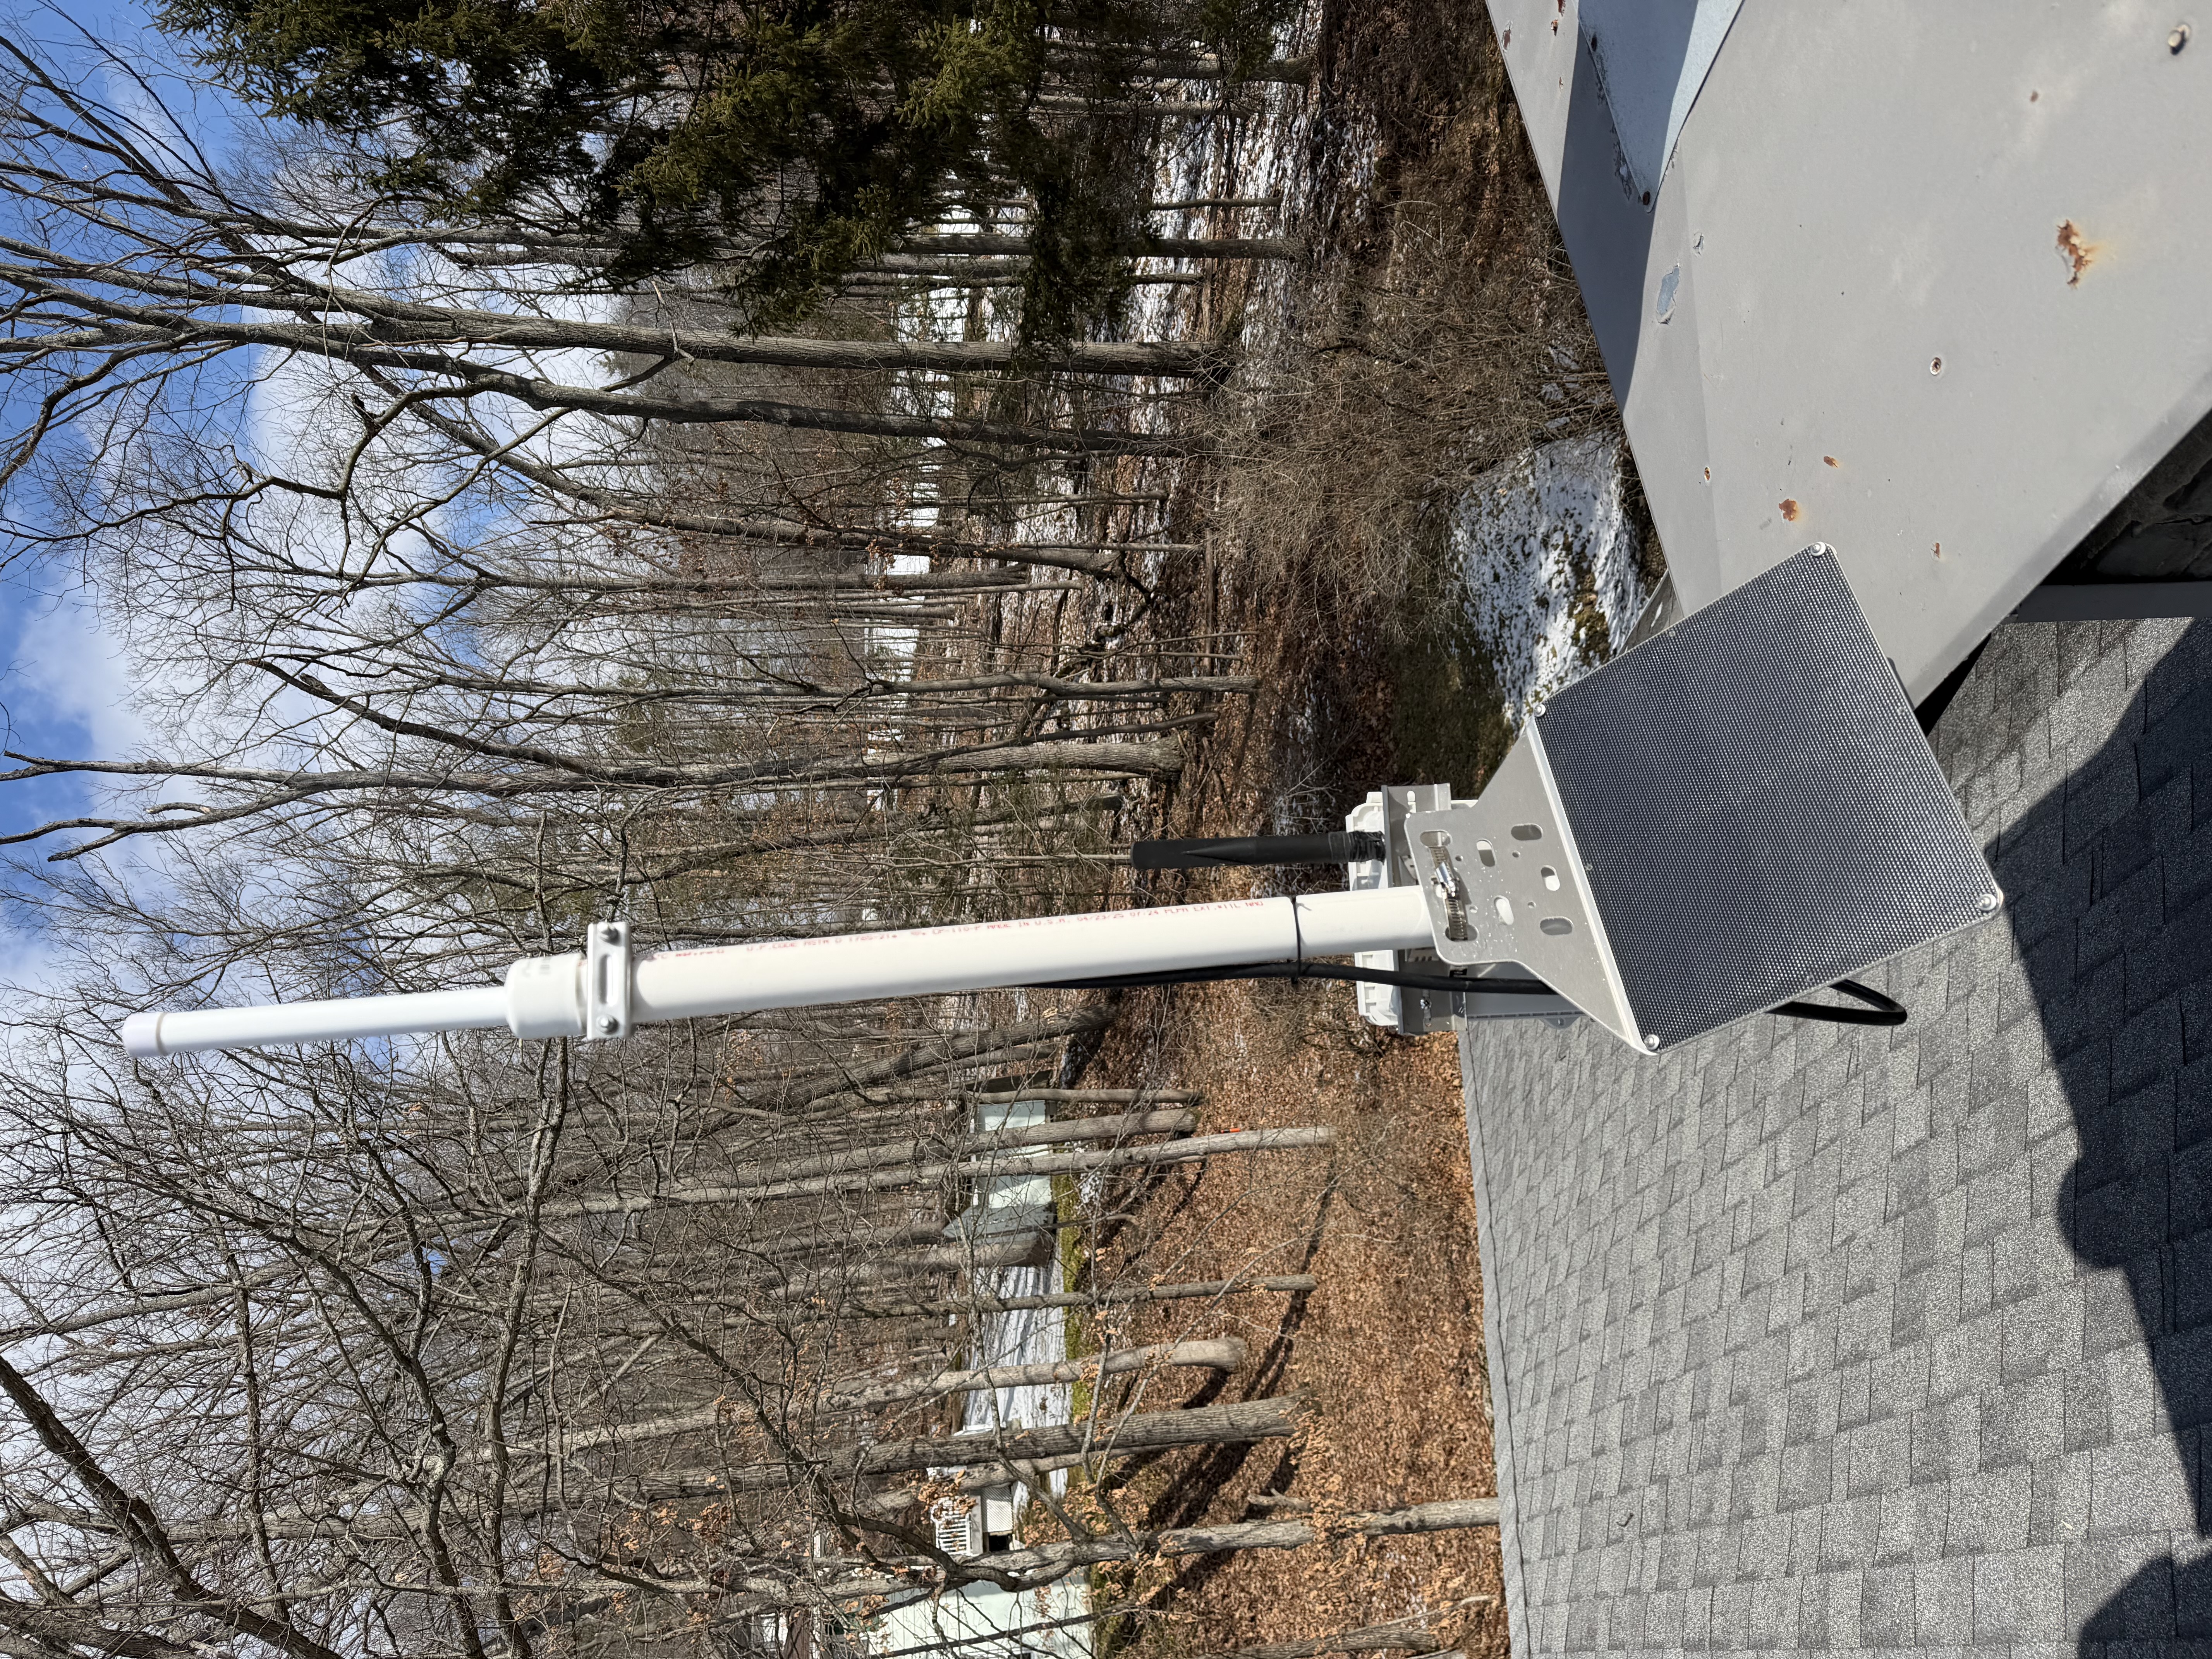
I already had a node on the roof, so I reused the existing Meshtastic node, antenna, and the mounting hardware attached to the chimney cap.
I am using a short run of 1 1/2-inch PVC pipe as a mounting sleeve for the enclosure and antenna so the whole assembly can be built on the ground and then slid into place. The PVC also made it possible to move the MeshCore antenna away from the Meshtastic antenna, which is mounted directly to the enclosure.
This made the deployment a lot easier mechanically, and it also gave me at least some antenna separation without needing a much larger rooftop mount.
RF Notes
The current antenna separation is about 14 inches. My guess is that this is roughly around a wavelength, but probably still not enough. Most of what I have read suggests something more like 2 to 3 feet of separation to reduce the chance of overload or one node going deaf from the other being so close.
So far, things appear to be working reasonably well. I did adjust some MeshCore repeater settings to help with the proximity issue, especially an AGC reset timer so the MeshCore node can recover if it goes deaf after hearing too much nearby Meshtastic traffic.
I have also read that a cavity filter may help isolate the nodes, but I do not know enough about filters yet to say how much it would help in this specific setup. I reached out to nullrouten from the Baymesh Meshtastic Community about his custom filters and already have some pricing and details. More on that in a future article.
Overall, I am happy with how the build turned out. It was a fun project, and now I get to watch how the dual-mesh setup behaves over time to see whether interference or power management becomes an issue.